

Unfastening the seatbelt
Unfastening the seatbelt
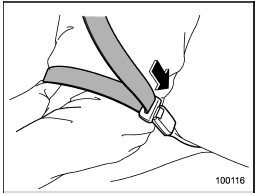
Push the release button of the center seatbelt buckle (on the left-hand side) to unfasten the seatbelt.
NOTE
When the seatback is folded down for greater cargo area, it is necessary to disconnect the connector.
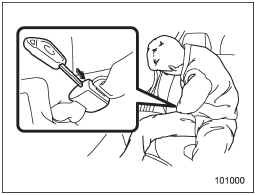
1. Insert a key or other hard pointed object into the slot in the connector (buckle) on the right-hand side and push it in, and the connector (tongue) plate will disconnect from the buckle.
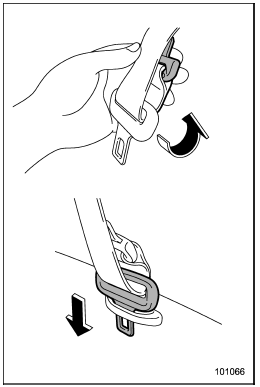
2. Allow the retractor to roll up the belt.
You should hold the webbing end and guide it back into the retractor while it is rolling up. Insert the connector (tongue) into the belt holder.
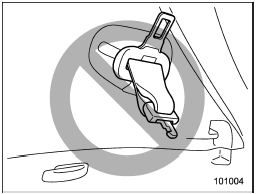

• Do not allow the retractor to roll up the seatbelt too quickly.
Otherwise, the metal tongue plates may hit against the trim, resulting in damaged trim.
• Have the seatbelt fully rolled up so that the tongue plates are neatly stored. A hanging tongue plate can swing and hit against the trim during driving, causing damage to the trim.
See also:
Windshield wipers
MIST : Mist (for a single wipe)
OFF : Off
INT: Intermittent
LO: Low speed
HI: High speed
To turn the wipers on, push the wiper control lever down.
To turn the wipers off, return the lever to t ...
Immobilizer
FCC WARNING
Changes or modifications not expressly
approved by the party responsible
for compliance could void
the user’s authority to operate the
equipment.
The immobilizer system is de ...
Hill start assist OFF indicator light (STI)
While the Hill start assist system is deactivated, the Hill start assist OFF indicator light illuminates continuously to inform the driver that the Hill start assist system is not operational. ...