

Foreword
Congratulations on choosing a SUBARU vehicle. This Owner’s Manual has all the information necessary to keep your SUBARU in excellent condition and to properly maintain the emission control system for minimizing emission pollutants. We urge you to read this manual carefully so that you may understand your vehicle and its operation. For information not found in this Owner’s Manual, such as details concerning repairs or adjustments, please contact the SUBARU dealer from whom you purchased your SUBARU or the nearest SUBARU dealer.
The information, specifications and illustrations found in this manual are those in effect at the time of printing. FUJI HEAVY INDUSTRIES LTD. reserves the right to change specifications and designs at any time without prior notice and without incurring any obligation to make the same or similar changes on vehicles previously sold. This Owner’s Manual applies to all models and covers all equipment, including factory installed options. Some explanations, therefore may be for equipment not installed in your vehicle.
Please leave this manual in the vehicle at the time of resale. The next owner will need the information found herein.
FUJI HEAVY INDUSTRIES LTD., TOKYO, JAPAN
 is a registered trademark of FUJI
HEAVY INDUSTRIES LTD.
is a registered trademark of FUJI
HEAVY INDUSTRIES LTD.
 Copyright 2010 FUJI HEAVY
INDUSTRIES LTD.
Copyright 2010 FUJI HEAVY
INDUSTRIES LTD.
This manual describes the following vehicle types.
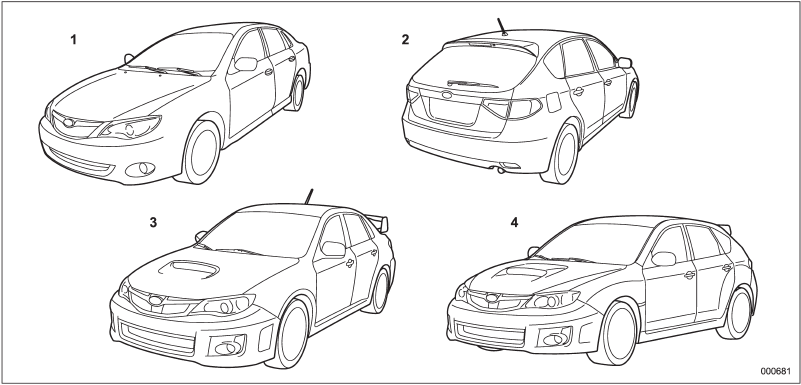
1) 4-door non-turbo models
2) 5-door non-turbo models and OUTBACK
3) 4-door turbo models
4) 5-door turbo models
See also:
4-door models
The trunk lid opens when the “”
button is pressed continuously for at least 2 seconds. An electronic chirp will sound twice and the turn signal lights will flash twice. ...
When CD is in the player (type C)
When CD is in the player (type C)
Each brief press of the “CD/AUX” button changes the modes in the following sequence.
When the CD mode is selected, the player will start playback. ...
To arm the system using remote transmitter
1. Close all windows and the moonroof (if equipped).
2. Remove the key from the ignition switch.
3. Open the doors and get out of the vehicle.
4. Make sure that the engine hood (and the trunk lid ( ...