Removing and reinstalling clips
Removing clips
There are several types of clips used for your vehicle
Type A clips
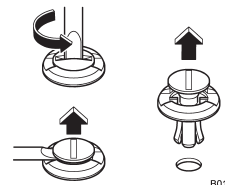
1. Turn the clips counterclockwise using a flat-head screwdriver until the center portion of the clip is raised.
2. Remove the clips with a flat-head screwdriver using leverage.
Type B clips
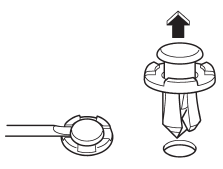
1. Pull out the center portion of the clip using a flat-head screwdriver as shown in the illustration.
2. Pull the protruded center portion to remove the entire body of the clip.
Type C clips
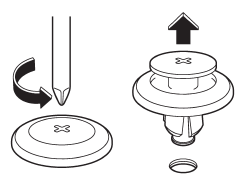
1. Turn the clip counterclockwise using a Phillips screwdriver until the center portion of the clip is raised.
2. Remove the entire clip by pulling it up.
Reinstalling clips
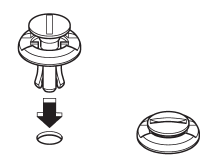
Type A clips
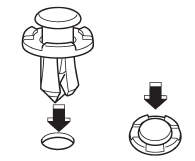
Type B clips
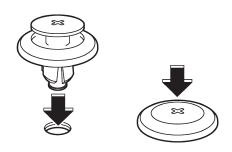
Type C clips
Insert the clip without the center portion first and then push the center portion of the clip into the hole.
See also:
Skip channel selection
When in the SAT mode, press the УSEEKФ button УФ
or УФ continuously to change to the
channel selection mode. Pressing the УSEEKФ button УФ
changes the channel up by 10 steps each time. Pressin ...
Maximum load limits
WARNING
Never exceed the maximum load limits explained in the following. Exceeding the
maximum load limits could cause personal injury and/or vehicle damage.
CAUTION
● Adequate size trailer ...
Sound controls and audio settings
NOTE
- SPEED VOLUME CONTROL is a
function that automatically adjusts the
volume according to the vehicle speed.
As the vehicle speed increases, the
audio volume automatically increases
to m ...


