Installing forward facing child restraint
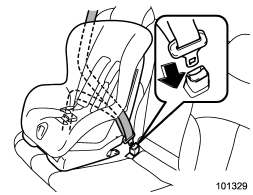
1. Place the child restraint system in the rear seating position.
2. Run the lap and shoulder belt through or around the child restraint system following the instructions provided by its manufacturer.
3. Insert the tongue plate into the buckle until you hear a click.
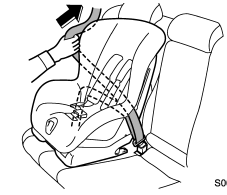
4. Take up the slack in the lap belt.
5. Pull out the seatbelt fully from the retractor to change the retractor over from the Emergency Locking Retractor (ELR) to the Automatic Locking Retractor (ALR) function. Then, allow the belt to rewind into the retractor. As the belt is rewinding, clicks will be heard which indicate the retractor functions as ALR.
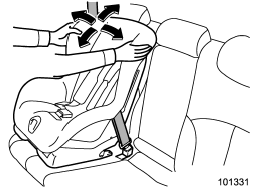
6. Before seating a child in the child restraint system, try to move it back and forth and left and right to verify that it is firmly secured in the center of the seat. Sometimes a child restraint can be more firmly secured by pushing it down into the seat cushion and then tightening the seatbelt.
7. Pull at the shoulder portion of the belt to confirm that it cannot be pulled out (ALR properly functioning).
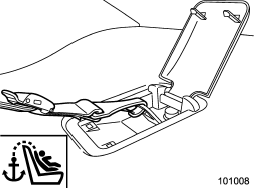
Legacy
8. If the child restraint system requires a top tether, latch the hook onto the top tether anchor and tighten the top tether. For additional instructions, refer to “Top tether anchorages” F1-36.
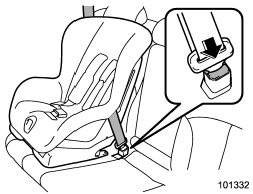
9. To remove the child restraint system, press the release button on the seatbelt buckle and allow the belt to retract completely. The belt will return to the ELR mode.
NOTE
When the child restraint system is no longer in use, remove it and restore the ELR function of the retractor. That function is restored by allowing the seatbelt to retract fully.
See also:
Power steering
The power steering system operates only when the engine is running.
If you lose power steering assist because the engine stops or the system fails to function, you can steer but it will take much mor ...
When there are CDs loaded (type B)
Disc select buttons
Press a desired one of the disc select buttons the disc number indicator of which steadily lights up. The player will then start playback of the selected CD, beginning with the fi ...
Front passenger’s SRS frontal airbag
The front passenger’s SRS frontal airbag uses a dual stage inflator. The inflator
operates in different ways depending on the severity of impact.
The total load on the seat is monitored by the pass ...


