

Low beam light bulbs
Right-hand side
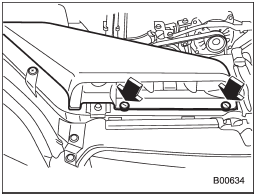
1. Use a screwdriver to undo the clips on the air intake duct, then remove the air intake duct (right-hand side).
Left-hand side
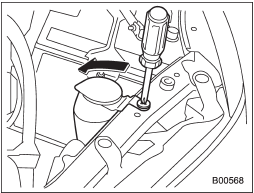
2. Use a screwdriver to remove the secured clip of the washer tank. To make it easy to access the bulb, move the washer tank to the horizontal direction (left-hand side).
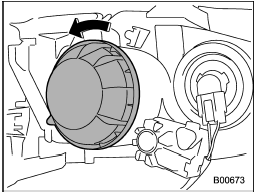
3. Remove the bulb cover, by turning it counterclockwise.
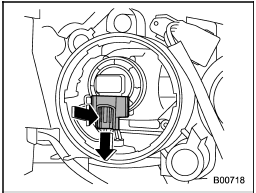
4. Disconnect the electrical connector from the bulb.
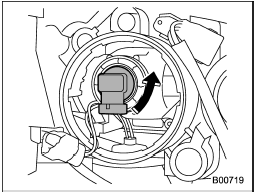
5. Remove the bulb from the headlight assembly by turning it counterclockwise.
6. Replace the bulb with a new one. At this time, do not touch the bulb surface.
7. To install the bulb to the headlight assembly, turn it clockwise until it clicks.
8. Reconnect the electrical connector.
9. Install the bulb cover.
10. Install the air intake duct with clips (right-hand side).
11. Set the washer tank to the original place and secure it by clip (left-hand side).
See also:
Displaying satellite radio ID of tuner
When you activate satellite radio, you should have your satellite radio tuner ID ready because each tuner is identified by its unique satellite radio tuner ID.
The satellite radio ID will be needed w ...
Electronic compass display
By briefly pressing the compass button, the compass display is toggled on or
off. When the compass display is on, an illuminated compass reading will appear
on the mirror.
Using the electronic co ...
When connecting iPod®
Each time you briefly press the “RPT/ RDM” button, the mode changes in the following sequence.
NOTE
• The “ALL RPT” indication refers to the repeat playback of all indexes in the entire iPod®.
...