

Windshield wiper blade rubber (type A and type B)
NOTE
The following illustrations show the replacement procedures of the blade rubber for a type A wiper blade assembly, however the replacement procedures are the same for a type B wiper blade assembly.
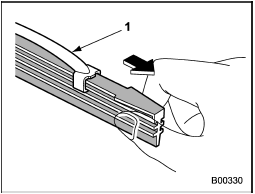
1) Metal support
1. Grasp the locked end of the blade rubber assembly and pull it firmly until the stoppers on the rubber are free of the metal support.
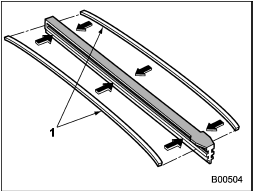
1) Metal spines
2. If the new blade rubber is not provided with two metal spines, remove the metal spines from the old blade rubber and install them in the new blade rubber.
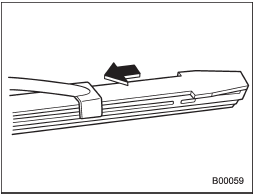
3. Align the claws of the metal support with the grooves in the rubber and slide the blade rubber assembly into the metal support until it locks.
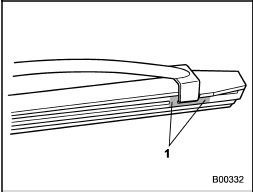
1) Stopper
4. Be sure to position the claws at the end of the metal support between the stoppers on the rubber as shown. If the rubber is not retained properly, the wiper blade may scratch the windshield.
NOTE
The illustration shows the replacement procedure for type A rubber wiper blades, however the replacement procedure is the same for type B. Perform the replacement of type B wiper blades following the procedure in this section.
See also:
Defogger and deicer
1) Rear window defogger
2) Outside mirror defogger (if equipped)
3) Windshield wiper deicer (if equipped)
The vehicle is equipped with a rear window defogger. Some models are also equipped
with ...
When “PUSH EJECT” is displayed
Press the eject button to unload the disc. Check the disc for damage or deformation,
and also check that the correct disc is inserted. Do not try to unload the disc
forcibly. Single CDs (i.e., 8 c ...
MUTE button (if equipped)
Press this button if you wish to immediately cut the volume to zero.
The audio display will show “MUTE”. If you press the button again, the original
sound volume will return and “MUTE” turns off. ...