

Connecting a trailer
1. Remove the receiver cover from the hitch receiver tube. Then insert the ball mount into the hitch receiver tube.
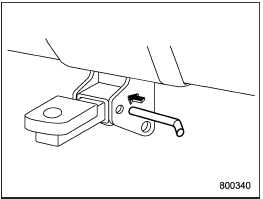
2. Insert the hitch pin into the hole on the hitch receiver tube so that the pin passes through the ball mount.
3. Insert the safety pin securely into the hitch pin.
4. Pull the ball mount to make sure it does not come off the hitch receiver.
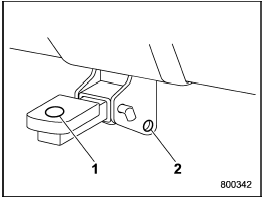
1) Hitch ball installation point
2) Hooks for safety chains
5. Use only a hitch ball that is appropriate for the ball mount and your trailer. The hitch ball must be securely installed on the ball mount.
6. Connect your trailer to the hitch ball.
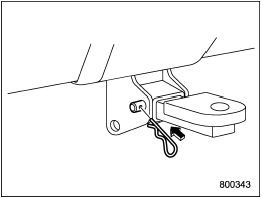
7. Connect the trailer and the hitch with safety chains that will hold the trailer’s maximum gross weight. The chains should cross under the trailer tongue to prevent the tongue from dropping onto the ground in case it should disconnect from the hitch ball. Allow sufficient slack in the chains taking tight-turn situations into account; however, be careful not to let them drag on the ground.

Do not connect safety chains to part of the vehicle other than the safety chain hooks.
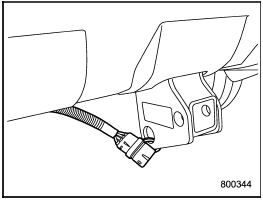
Hitch harness connector
8. Connect the hitch wire harness’s black four-pin wire connector to the towing trailer’s wire harness 9. Confirm proper function of the hitch wire harness by individually activating the brake, stop, and turn signal lights on the trailer.
NOTE
Always disconnect the trailer wire harness
before launching or retrieving a
watercraft.
See also:
To arm the system using remote transmitter
1. Close all windows and the moonroof (if equipped).
2. Remove the key from the ignition switch.
3. Open the doors and get out of the vehicle.
4. Make sure that the engine hood (and the trunk lid ( ...
Recommended clutch fluid
Refer to “Fluids”.
Never use different brands of clutch fluid together. Also, avoid mixing DOT 3 and DOT 4 brake fluids even if they are the same brand. ...
MUTE button (models without Hands-free system)
Press the “” button if you wish
to
immediately cut the volume to zero.
The audio display will show “MUTE”.
If you press the button again, the original
sound volume will return and “MUTE”
t ...