

Rear center seatbelt

Rear center seatbelt
1) Center seatbelt tongue plate
2) Connector (tongue)
3) Connector (buckle)
4) Center seatbelt buckle
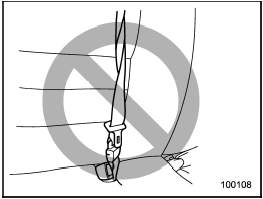

Fastening the seatbelt with the webbing twisted can increase the risk or severity of injury in an accident.
When fastening the belt after it is pulled out from the retractor, especially when inserting the connector’s tongue plate into the mating buckle (on right-hand side), always check that the webbing is not twisted.
Be sure to fasten both tongue plates to the respective buckles. If the seatbelt is used only as a shoulder belt (with the connector’s tongue plate not fastened to the connector’s buckle on the right-hand side), it cannot properly restrain the wearer in position in an accident, possibly resulting in serious injury or death.
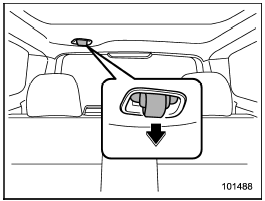
The rear center seatbelt is stowed in a recessed compartment located in the ceiling above the cargo area.
1. Remove the tongue plate from the slot in the recessed compartment and pull out the seatbelt slowly.
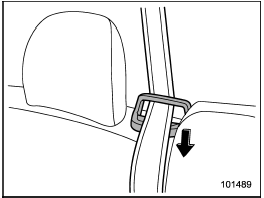
2. After drawing out the seatbelt, pass it through the belt guide.
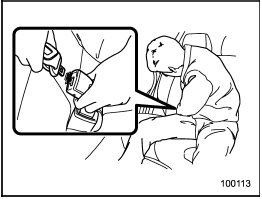
3. After confirming that the webbing is not twisted, insert the connector (tongue) attached at the webbing end into the buckle on the right-hand side until a click is heard.
If the belt stops before reaching the buckle, return the belt slightly and pull it out more slowly. If the belt still cannot be unlocked, let the belt retract slightly after giving it a strong pull, then pull it out slowly again.
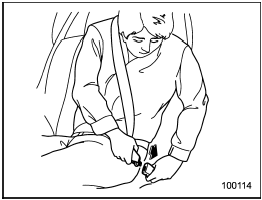
4. Insert the center seatbelt tongue plate into the center seatbelt buckle marked “CENTER” on the left-hand side until it clicks.
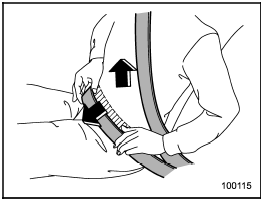
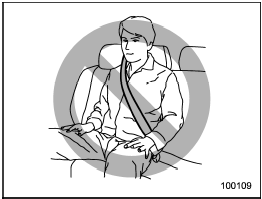
5. To make the lap part tight, pull up on the shoulder belt.
6. Place the lap belt as low as possible on your hips, not on your waist.
See also:
Folder selection
Press the “” side of the “FOLDER”
button briefly to select the next folder.
Press the “” side of the button briefly
to go back to the previous folder.
NOTE
● Selecting folders in this w ...
Connectable iPod® models
Do not connect an iPod® other than the previously stated models. Doing so may result in a malfunction or, depending on conditions, cause a fire.
NOTE
• iPod® is a registered trademark of Apple ...
Vehicle Dynamics Control system
Always use the utmost care in
driving – overconfidence because
you are driving a vehicle with the
Vehicle Dynamics Control system
could easily lead to a serious accident.
- Even if yo ...