

Rear combination lights
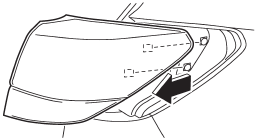
Legacy
NOTE
It may be difficult to replace the bulbs. We recommend that you have the bulbs replaced by your SUBARU dealer if necessary.
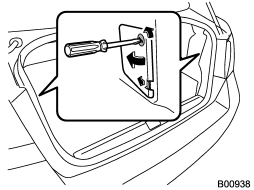
1. Turn the knobs of the cover 90 degrees counterclockwise to remove the cover.
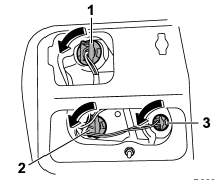
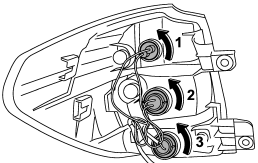
1) Brake/tail and rear side marker light 2) Rear turn signal light 3) Back-up light
2. Remove the bulb holder from the rear combination light assembly by turning it counterclockwise. Use pliers if necessary.
3. Pull the bulb out of the bulb holder and replace it with a new one.
4. Set the bulb holder into the rear combination light assembly and turn it clockwise until it locks.
5. Securely lock the cover against the trunk trim.
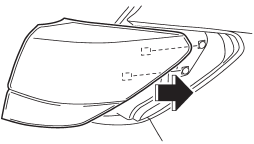
Outback
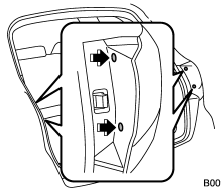
1. Undo the clips. For the method to undo the clips, refer to “Type C clips” F11-6.
2. Remove the cover.
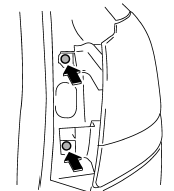
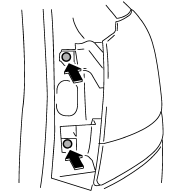
3. Remove the upper and lower screws.
4. Slide the rear combination light assembly straight rearward and remove it from the vehicle.
1) Tail and rear side marker light
2) Brake light
3) Rear turn signal light
5. Remove the bulb holder from the rear combination light assembly by turning it counterclockwise.
6. Pull the bulb out of the bulb holder and replace it with a new one.
7. Set the bulb holder into the rear combination light assembly and turn it clockwise until it locks.
8. Reinstall the rear combination light assembly by sliding the two-pronged part of the combination light assembly securely to each holder of the vehicle side.
9. Tighten the upper and lower screws.
10. Reinstall the side cover.
See also:
If the passenger’s frontal airbag OFF indicator illuminates and the ON
indicator turns off even when the front passenger’s seat is occupied by an adult
This can be caused by the adult incorrectly
sitting in the front passenger’s seat.
Turn the ignition switch to the “LOCK”
position. Ask the front passenger to set
the seatback to the upright po ...
Defroster button
To defrost or dehumidify the windshield
and front door windows, press the defroster button “”.
When the “” button is pressed, the
air conditioner compressor automatically operates to quickly ...
Airflow control buttons
Each airflow control button activates the following air outlets.
: Instrument panel outlets
: Instrument panel outlets and foot
outlets
: Foot outlets, both side outlets of
the instrument p ...