Subaru Outback (BR): Fuel gauge

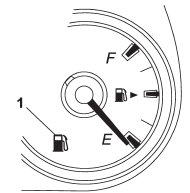
1) Low fuel warning light
The fuel gauge shows the approximate amount of fuel remaining in the tank. When
the ignition switch is in the “LOCK” or “Acc” position, the fuel gauge shows “E”
even if the fuel tank contains fuel.
The gauge may move slightly during braking, turning or acceleration due to fuel
level movement in the tank.
If you press the trip knob while the ignition switch is in the “LOCK” or “Acc”
position, the fuel gauge’s dial will light up and the needle will indicate the amount
of fuel remaining in the tank.
If, while the fuel gauge needle is indicating the amount of fuel remaining in
the tank, you (a) do not press the trip knob for 10 seconds or (b) open and close
the driver’s door, the fuel gauge needle will drop to the “E” position and the dial
and needle will turn off.
NOTE

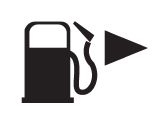
You will see the “ ” sign in the fuel
gauge.
This indicates that the fuel filler door (lid) is located on the right side of
the vehicle.
READ NEXT:
The fuel tank's low fuel warning light activates when it's nearly empty and only functions with the ignition switch in the "ON" position. When this light comes on, it's crucial to refill the
1) U.S.-spec. models
2) Except U.S.-spec. models
The ECO gauge shows the difference between the average rate of fuel consumption
and the current rate of fuel consumption. Using the average rate
Several of the warning and indicator lights illuminate momentarily and then go
out when the ignition switch is initially turned to the “ON” position. This permits
checking the operation of the
SEE MORE:
When the shift lever or select lever is set to “R”, the rear view camera automatically
displays the rear view image from the vehicle. When the lever is set to other positions,
the image before setting to “R” is displayed.
1. Set the ignition switch to “ON”.
2. Set the shift lever o
1. Remove the lens by prying the edge of the lens with a flat-head screwdriver.
2. Turn the bulb until the flat surfaces at its ends are aligned vertically.
3. Pull the bulb straight downward to remove it.
4. Install a new bulb.
5. Reinstall the lens.
© 2010-2024 Copyright www.suoutback.com


 ” sign in the fuel

