Subaru Outback (BR): Rear window side seating position

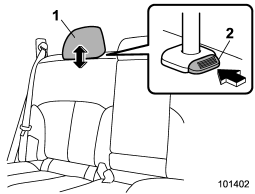
1) Head restraint 2) Release button
To raise:
Pull the head restraint up.
To lower:
Push the head restraint down while pressing the release button on the top of the seatback.
To remove:
While pressing the release button, pull out the head restraint.
To install:
Install the head restraint into the holes that are located on the top of the seatback until the head restraint locks.
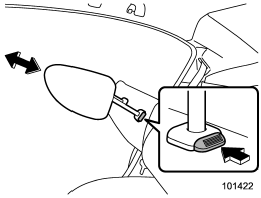
The head restraint should be adjusted so that the center of the head restraint is closest to the top of the occupant’s ears. When the seats are not occupied, lower the head restraints to improve rearward visibility.

NOTE
For Legacy, it is not possible to remove or install the head restraint without folding down the rear seatback. Fold down the rear seatback and then remove or install the head restraint.
READ NEXT:
CAUTION
The head restraint is not intended to be used at the lowest position. Before sitting on the seat, raise the head restraint to the extended position.
A) When not used (retracted po
To lower the armrest, pull on the top edge of the armrest.
WARNING
To avoid the possibility of serious injury, passengers must never be allowed
to sit on the center armrest while the vehicle is
SEE MORE:
A: SPECIFICATION
B: COMPONENT
1. FRONT WIPER
Wiper rubber
Wiper blade ASSY
Wiper arm ASSY
Pivot cover B
Wiper link ASSY
Pivot cover C
Wiper motor assembly
Tightening torque: N*m (kgf-m, ft-lb)
T1: 6 (0.61, 4.4)
T2: 7.5 (0.76, 5.5)
T3: 22 (2.24, 16.2)
1. Remove the air intake duct (right-hand side). For the method to remove the
air intake duct, refer to “Removing air intake duct” F11-7.
Left-hand side
2. Use a screwdriver to remove the secured clip of the washer tank. To make it
easy to access the bulb, move the washer tank to the hor
© 2010-2024 Copyright www.suoutback.com


